Tracing loops and bridges
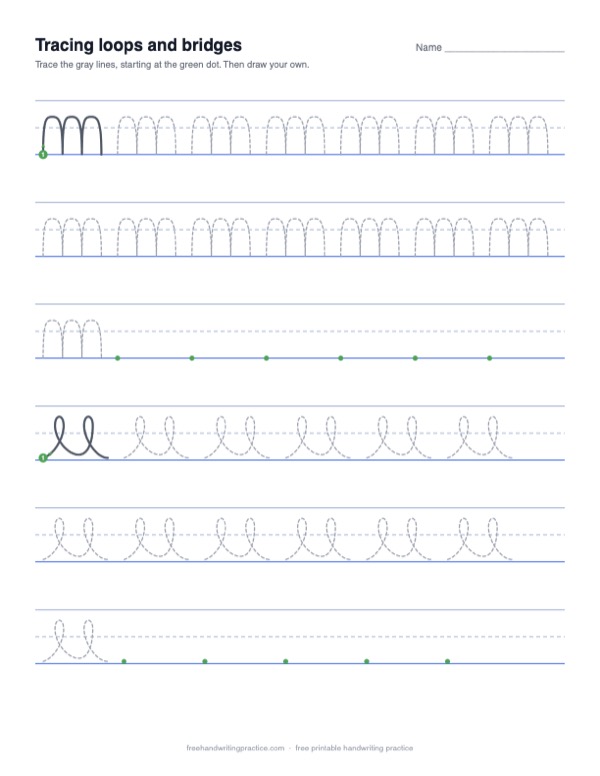
Loops and bridges are the last pre-writing patterns before letters. Bridges (up and over, down to the line) are the humps of n and m. Loops are the ovals of l, e and the cursive joins. Trace each row from the green dot without lifting the pencil, keeping the loops the same size.
Printable worksheet
The bridges and loops: for each one, a row with a dark model (numbered green dots and an arrow show where to start and which way to go), a row of gray copies to trace, and a row with only green start dots to draw it alone.
How to draw each one
- Bridges: Up and over, down to the line, then up and over again, like the humps of the letters n and m.
- Loops: Go up and round to the left, cross over and go up again. Keep the loops the same size.
Letters that use these strokes: n m h l e and cursive.
Or trace it on an iPad or phone
Trace with an Apple Pencil or a finger, then press Check for instant feedback on the path, the stroke order and the size. It runs in the browser, with no app and no sign-up.
- Trace the stroke
- Trace the light stroke
- Write it on your own
On-screen tracing is made for an iPad or phone
With a mouse or trackpad, tracing does not train the hand. Print the worksheet above and practice with a pencil. To trace with an Apple Pencil or a finger, scan the code with your tablet or phone camera to open this page there.
A bridge to the letter n
A bridge goes up, over and down to the line, then straight back up for the next one. Two bridges joined make the second half of m; one bridge after a standing line is an n. Children who can do a row of even bridges usually write n and m without trouble.
Loops lead to cursive
A row of loops is the same movement as a row of cursive e's and l's. Older children who are starting cursive can use this sheet as a warm-up, and younger ones can treat it as a rollercoaster.
Finished them all? Print a free Super Tracer certificate.